Cold Weather? Make Bundt® Luminaria!
Have you ever experienced below zero outdoor temperatures where you live, or wondered what it was like? For Minnesotans, it’s a regular part of winter that we’ve become acclimated to. Some might even admit to liking frigid temperatures just a bit, because it means that you have most places to yourself when and if you venture outside! That walking trail around the lake is all yours, and you can easily grab that closest parking spot to the door when you pull up at the grocery store to stock up on baking supplies. Speaking of baking…can you think of any better way to spend an icy winter weekend than working on a baking project indoors? Neither can we, and we usually use these cold snaps as opportunities to tackle a more involved recipe that we’ve been eyeing.
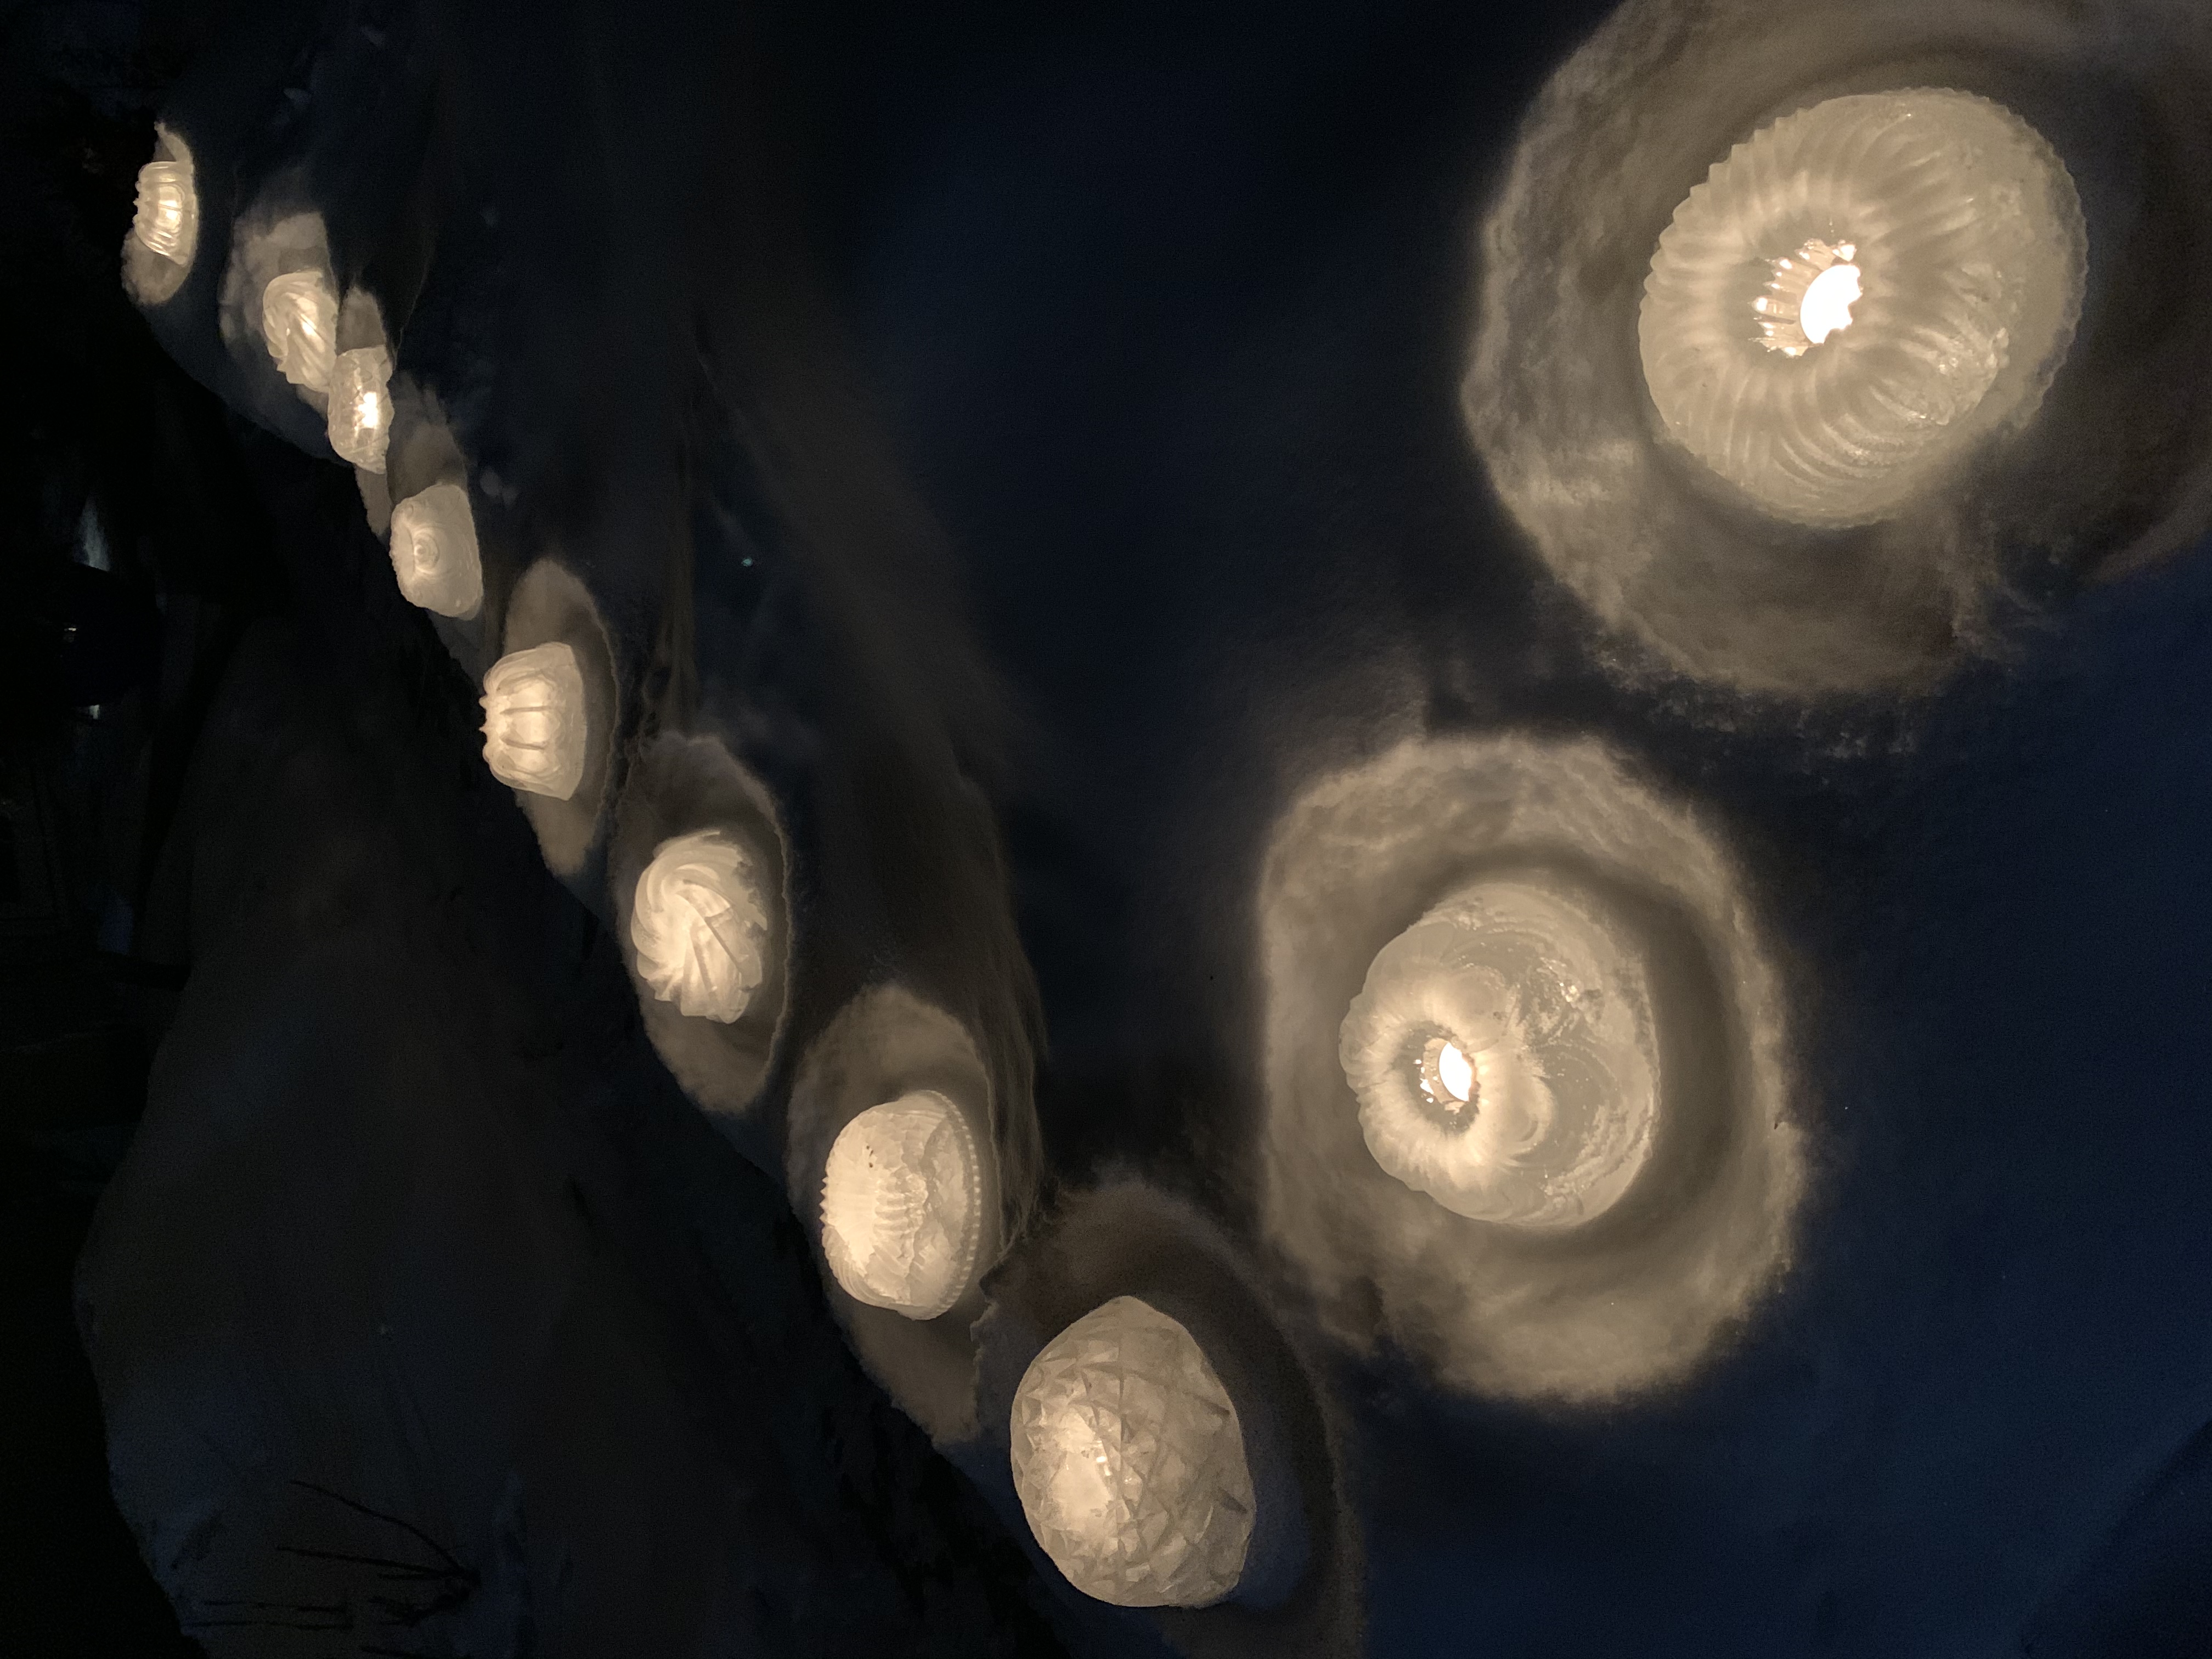
The past two weeks have brought a near-record breaking stretch of consecutive below zero days to Minnesota, where Nordic Ware is headquartered and all of our products are made. Daytime highs this past weekend were -8°F, and overnight lows dipped into the -20°F range. It’s so cold that frostbite occurs on exposed skin in a matter of minutes. It also means that water freezes very rapidly…which led us to the idea of freezing water in Bundt pans to make ice luminaria.
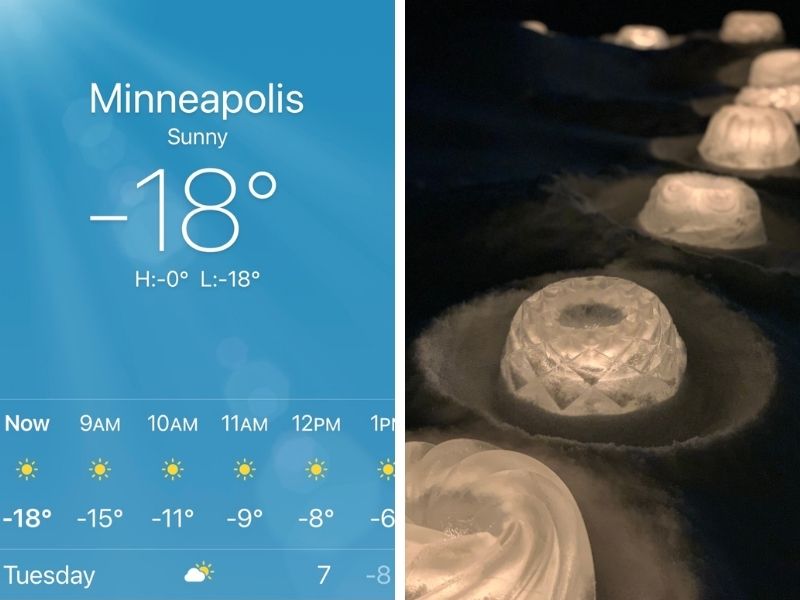
Luminaria light up a cold winter night with a warm glow and are a fun project to work on. They also show off the natural beauty of intricate Bundt designs, but in icy detail. Depending on how long temperatures remain below freezing in your part of the world, ice luminaria can last for days, weeks or even months (as is the case in Minnesota!). If you decide to give them a try, here are a few steps and tips we’ve learned over the years to make the process go smoothly:
What Kind of Water?
There are some urban legends that boiling water or using distilled water will result in perfectly clear ice. What we’ve read on this subject is that clarity of ice actually has very little to do with how pure the water is, but rather with how it freezes. Ice Bundts are beautiful whether they’re clear or opaque, so it doesn’t really matter to us. We just use cold tap water to achieve the results you see here. If you’re the perfectionist sort, you can try insulating the sides and bottom of the pan so that the ice freezes from the top down, which we are told forces trapped air bubbles toward the bottom and results in greater ice clarity. Do this by wrapping the bottom and sides of the pan in a loosely bunched up towel, but leaving the water at the top exposed.
Where and How to Freeze
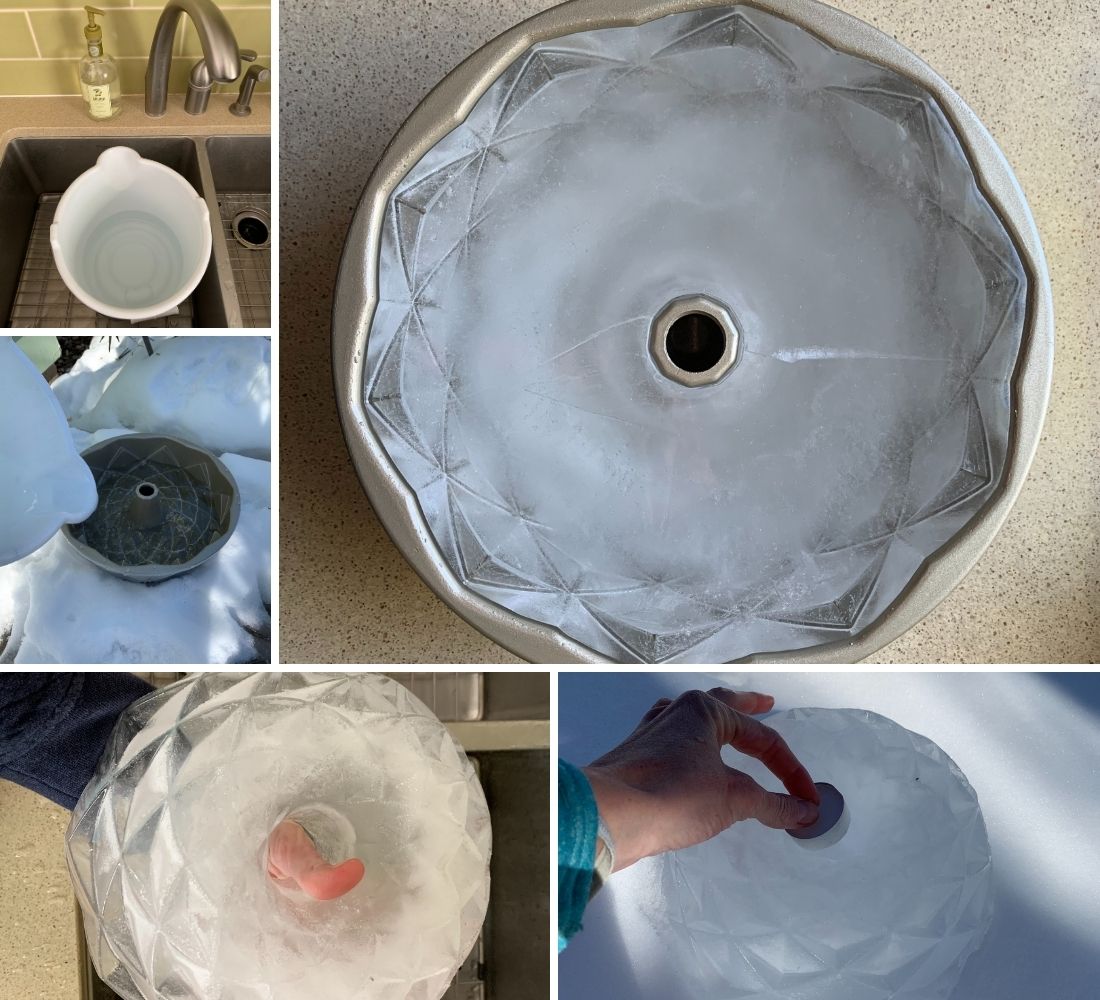
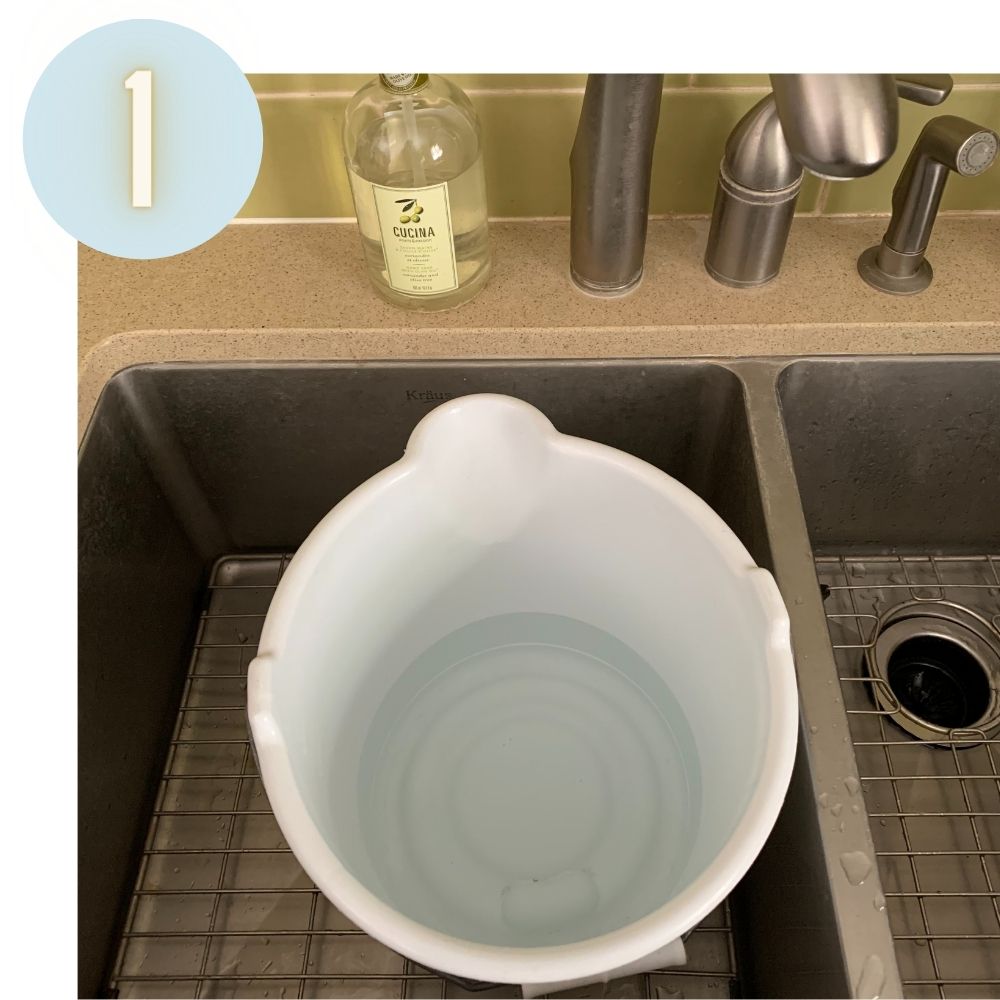
Find a shady spot outdoors (sunlight will slow down the freezing process!) on a nice flat snow-free surface to set out your Bundt pans. We like to set the pans in place and then fill with cold water using a bucket so that we aren’t carrying Bundts full of water through our house, which just seems like asking for trouble! Pour the water in slowly so it doesn’t splash out. Fill to within ¼ inch of the top of the pan.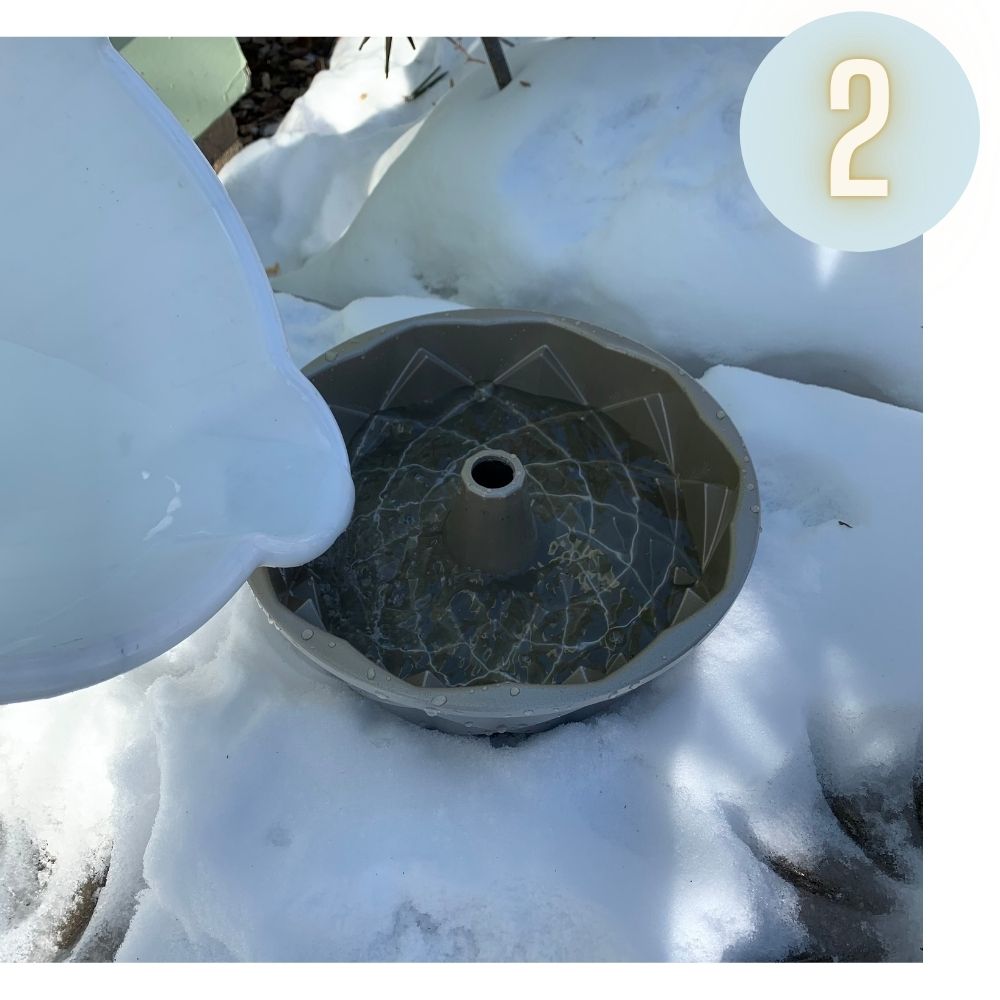
Waiting Game
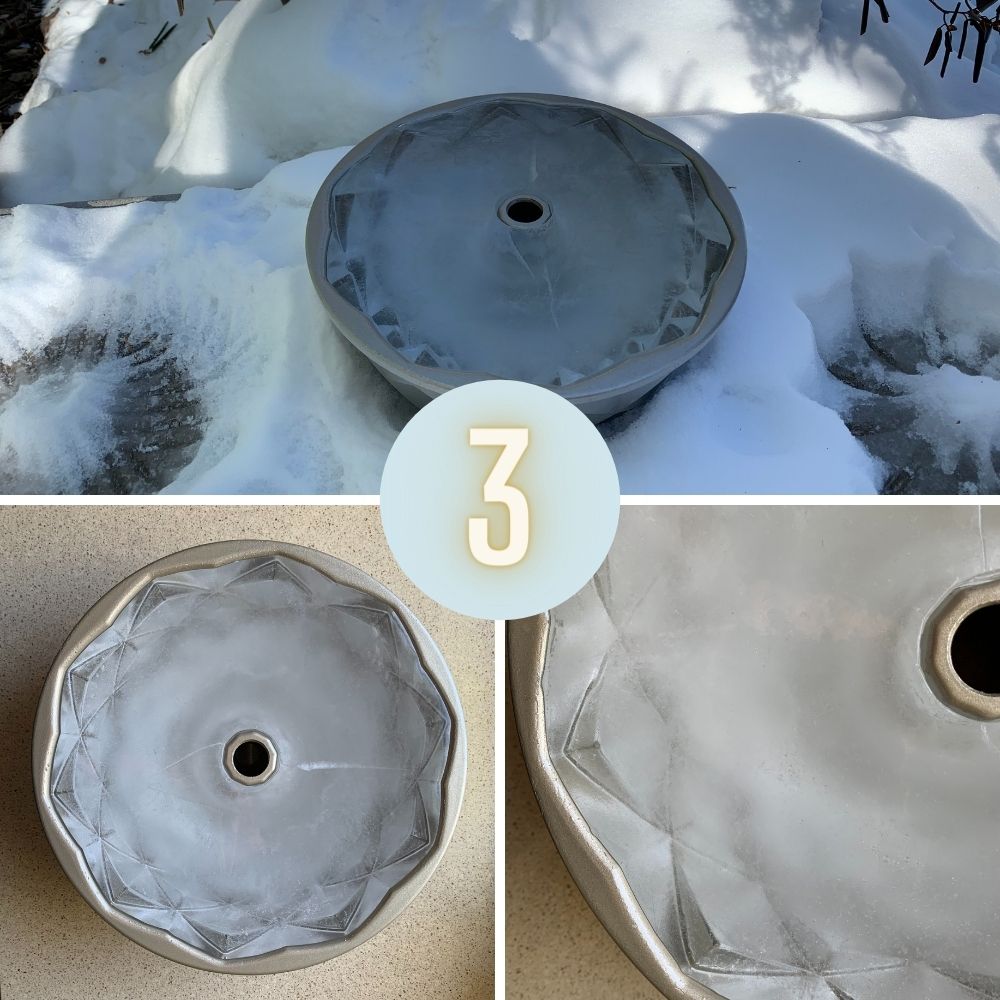
The time they will take to freeze is dependent on the outdoor air temperature. If it’s only a few degrees below 32°F, they can sit for 8-10 hours and you’ll only have a thin layer of ice formed, with liquid water in the center. When it’s below zero, the process goes much more rapidly. We’ve been achieving solidly frozen results in 4-5 hours with temperatures in the -6 to -10°F range. If it isn’t cold enough to freeze them solid in a reasonable amount of time where you live, we recommend just working with partially frozen results. The water inside will drain out when you release them from the pan, but the results are still stunning.
One important point to note: We do not recommend letting your pans sit with water in them for days at a time, waiting to freeze. This can damage the nonstick on your pans. If temperatures are only in the 20s or higher, try freezing them in your freezer to speed up the process and reduce the amount of time that water sits in the pan.
Catch and Release…or Release and Catch!
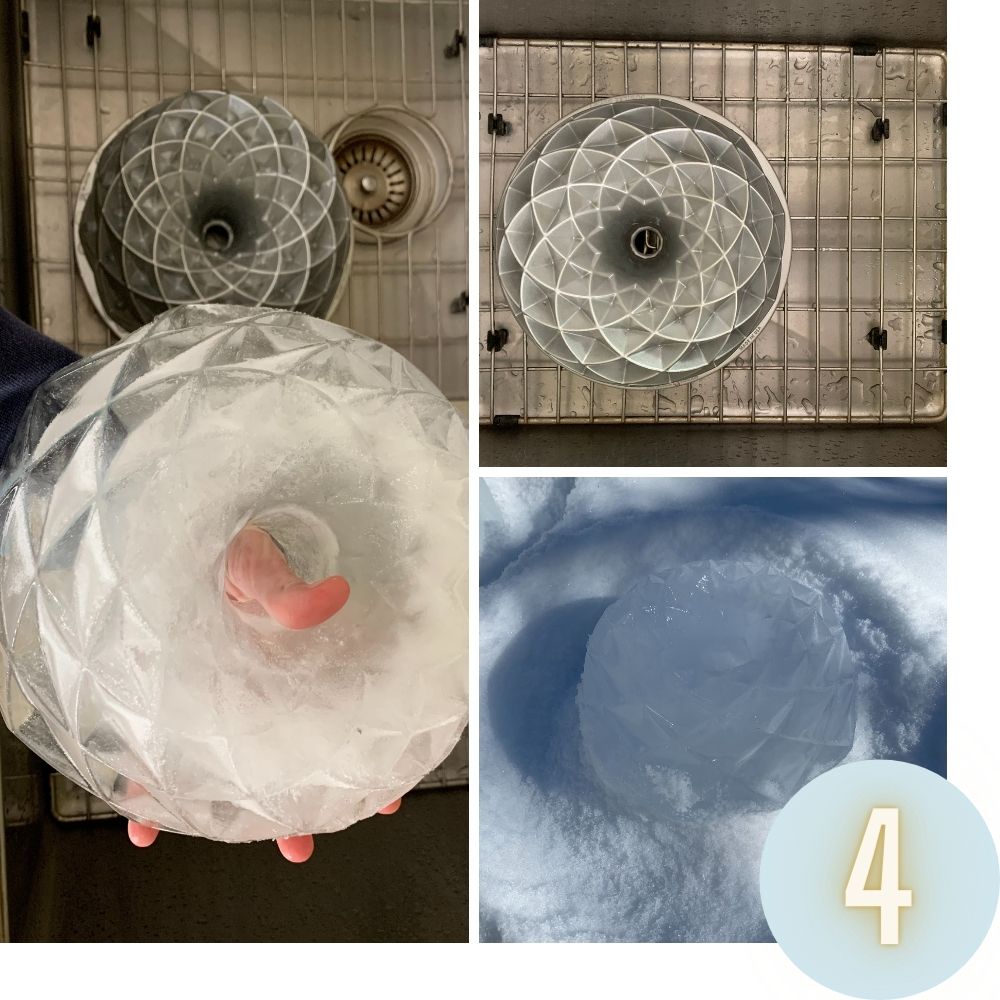
When you’re ready to remove them from the pan, bring the ice Bundts inside and turn upside down in your sink. Hold one hand on the pan and the other beneath the pan so you can catch the ice the moment it pops out of the pan. Run the pan under cool to warm (but not hot!) water for just a few seconds. Immediately bring the ice Bundt outside so it remains below freezing temperatures.
The Final Touches
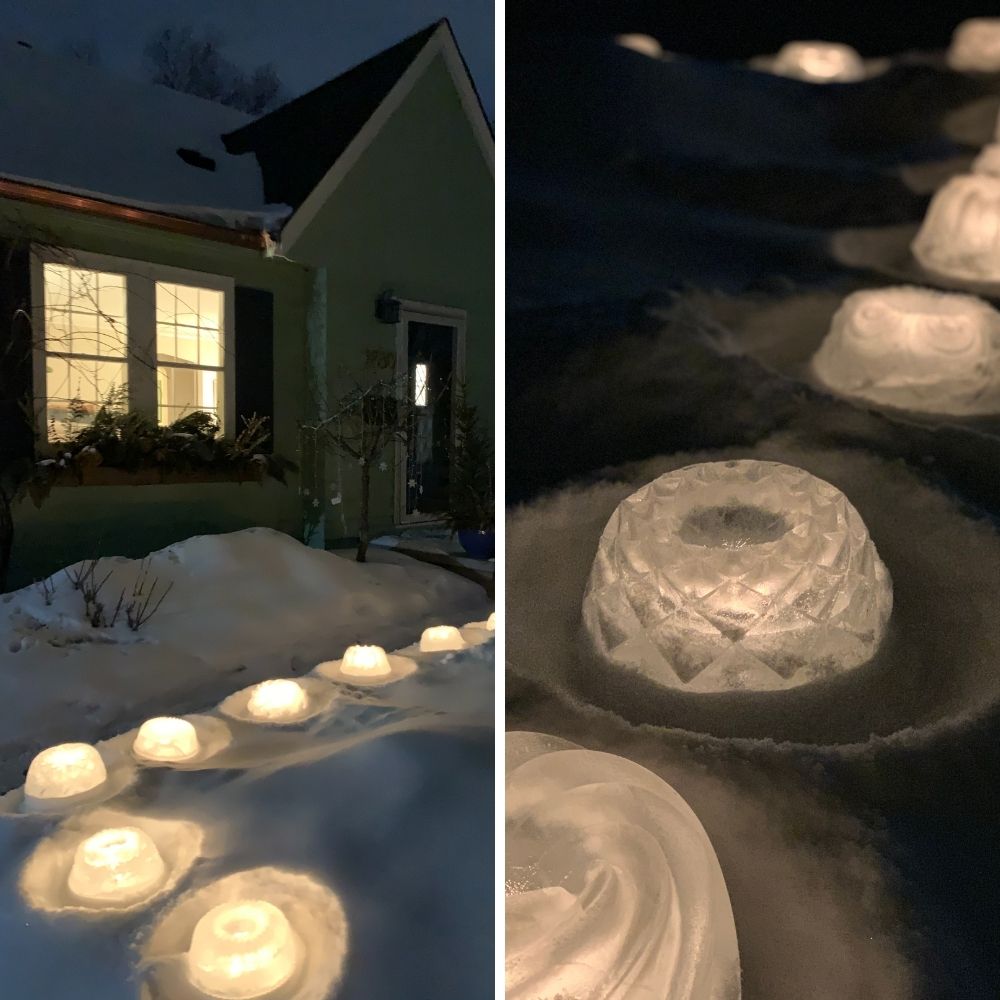
When setting your luminaria out for display, find a nice flat spot so they sit level. If they are tilted, they will tend to melt unevenly when a candle is placed inside and lit. For wind-proof results, use faux candles. Or, as we did here, wait for a calm no-wind evening, light some tea lights, and enjoy the warm glow! The further down you’re able to nestle the candle, the more wind-resistant your luminaria will be.
We hope you’ll try this fun project at home next time it’s below freezing! Share your results by tagging us on social and using the hashtag #BundtLuminaria