What To Do After Your Sourdough Bread is Done Baking: Bread Baking Analysis and Storage Tips
There’s nothing quite like pulling a golden, crusty sourdough loaf out of the oven, but your job as a baker isn’t done just yet. What you do after your sourdough bread bakes is just as important as the mixing, proofing, and shaping stages. By evaluating your sourdough bread’s crumb and learning proper storage methods, you’ll improve future bakes and extend the life of your loaf. Whether you’re a beginner sourdough baker or a seasoned pro, these post-bake practices are essential for mastering the art of sourdough.
What Is Sourdough Crumb and Why Does It Matter?
The crumb of your sourdough bread refers to the interior texture and structure of the loaf. An ideal sourdough crumb has an even distribution of air pockets, an open but not overly holey interior, and a slightly chewy bite that balances softness with structure. This kind of crumb indicates that your dough was well-fermented and properly proofed, and that your starter was active and strong.
Evaluating the crumb after your loaf has cooled is one of the best learning tools in sourdough baking. It gives insight into how well the fermentation, shaping, and oven spring worked. Instead of aiming for perfection, focus on consistency. Try baking the same recipe several times so you can fine-tune your technique with reliable results and learn how changes in temperature, humidity, time, or ingredient ratios affect your final product.
How to analyze and improve sourdough bread crumb
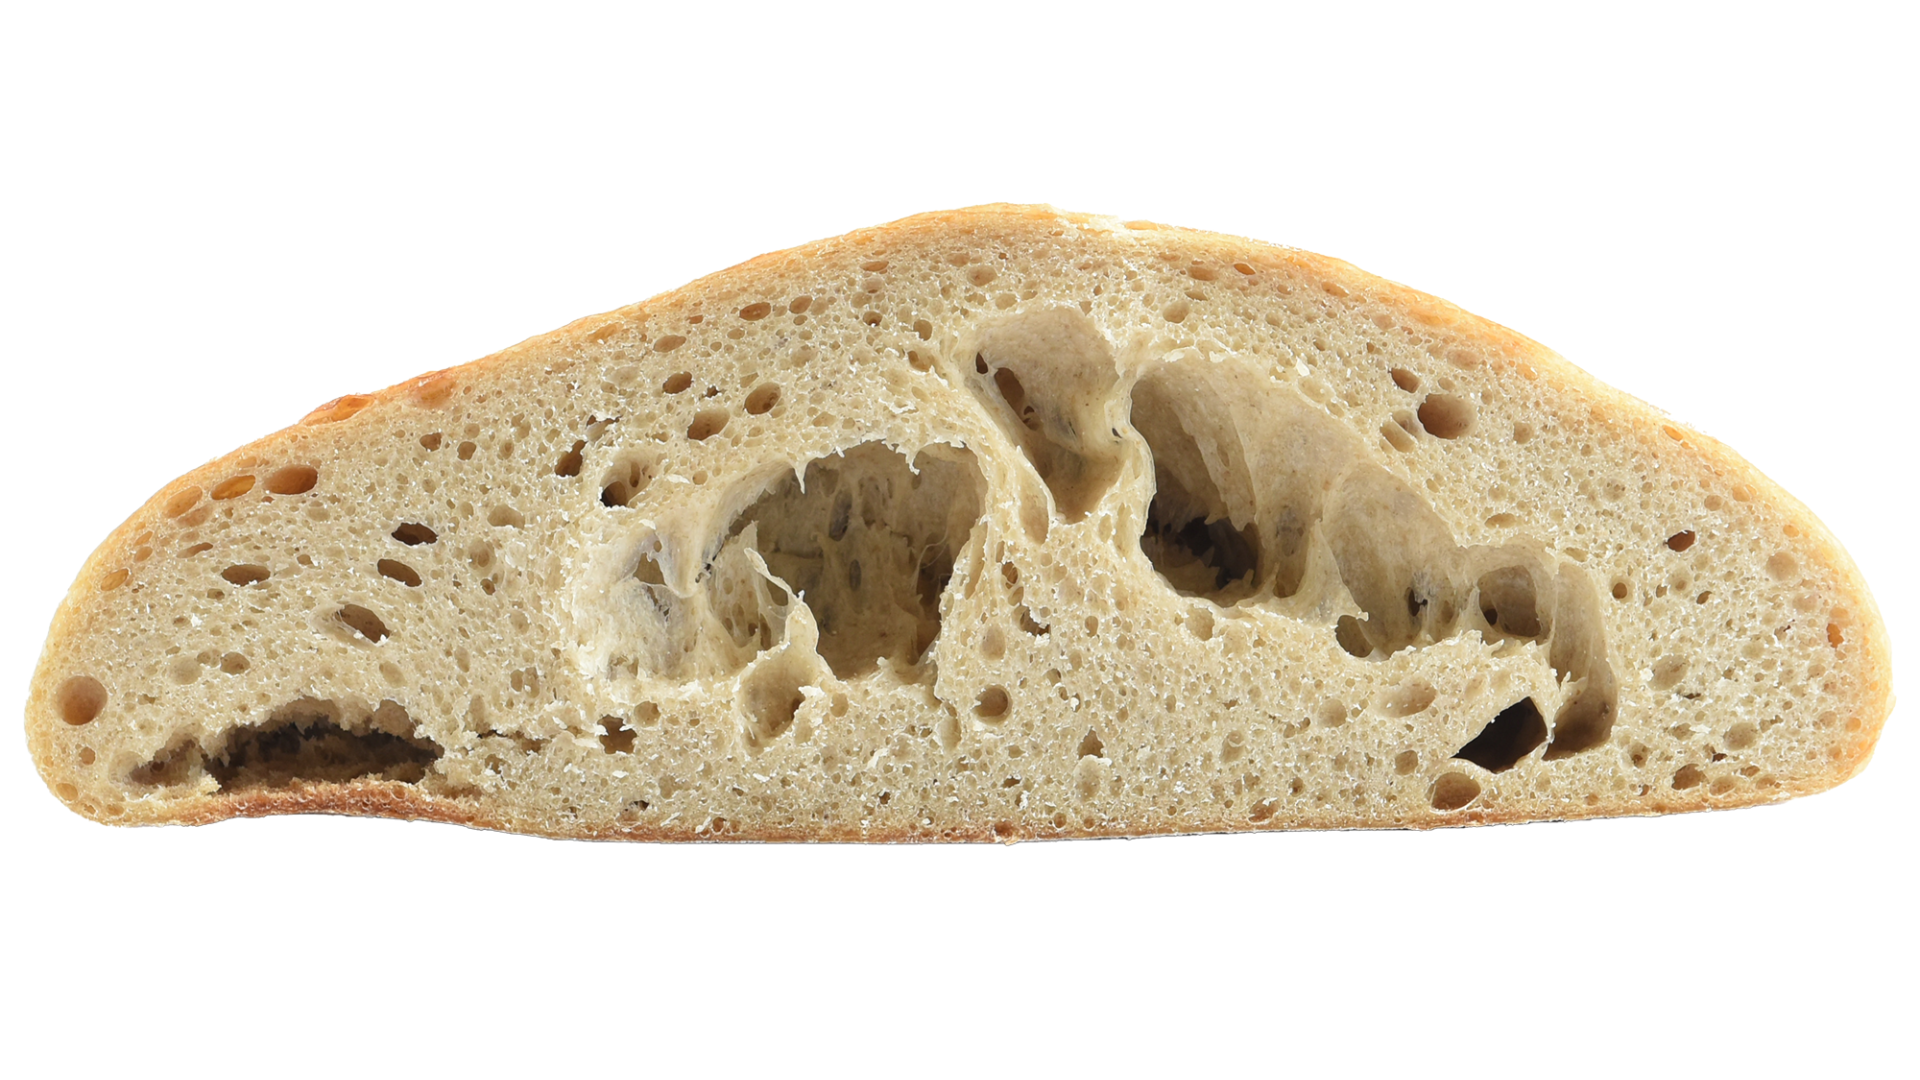
Under-Fermented Sourdough Loaves
An under-fermented loaf usually has a tight, dense crumb with large, irregular holes clustered near the top. It may feel gummy or overly chewy. This typically means that the bulk fermentation stage ended too early, not allowing enough time for the yeast and bacteria to produce the gas and acids that give sourdough its light texture and tangy flavor. It can also happen if your sourdough starter wasn’t fully mature or active at the time of mixing.
If your loaf seems under-proofed, try extending the bulk fermentation during your next bake. Watch for signs like increased dough volume, bubbles along the sides of your mixing bowl, and a soft, jiggly texture before you begin shaping.

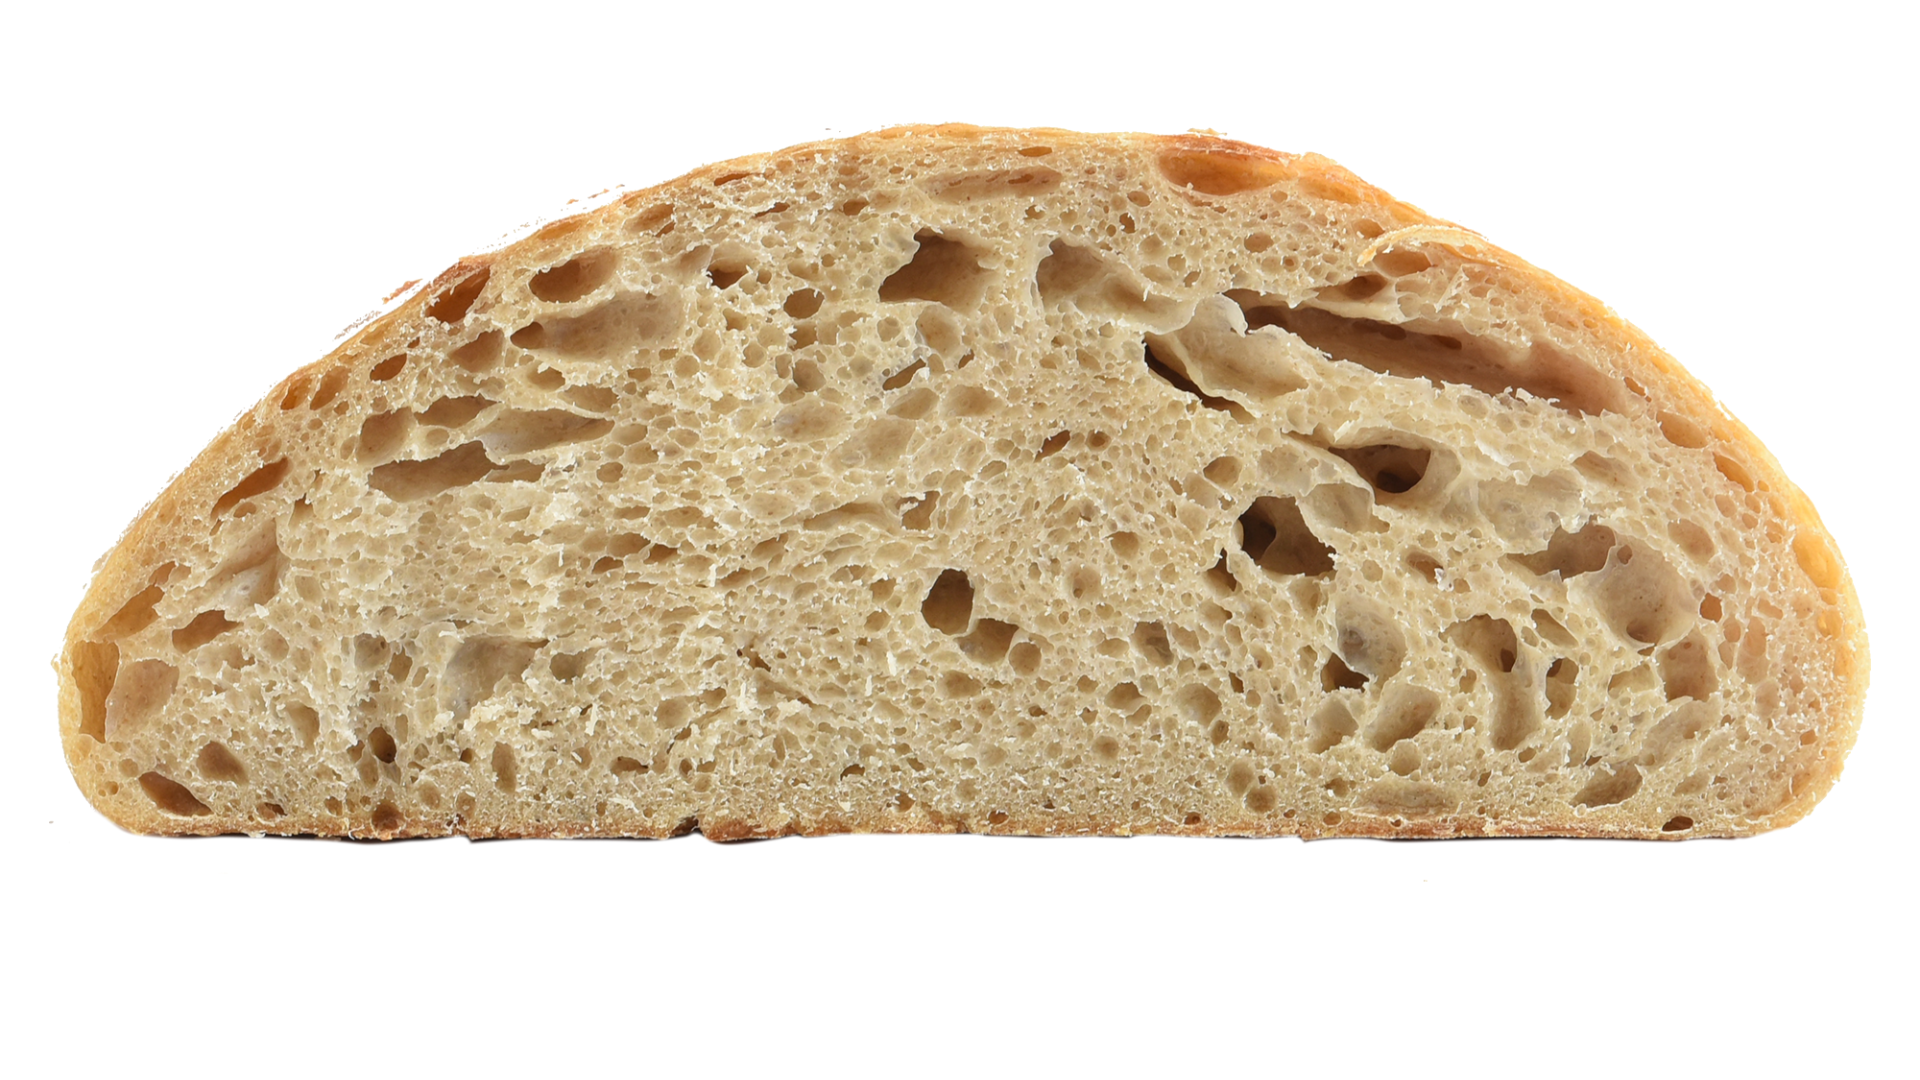
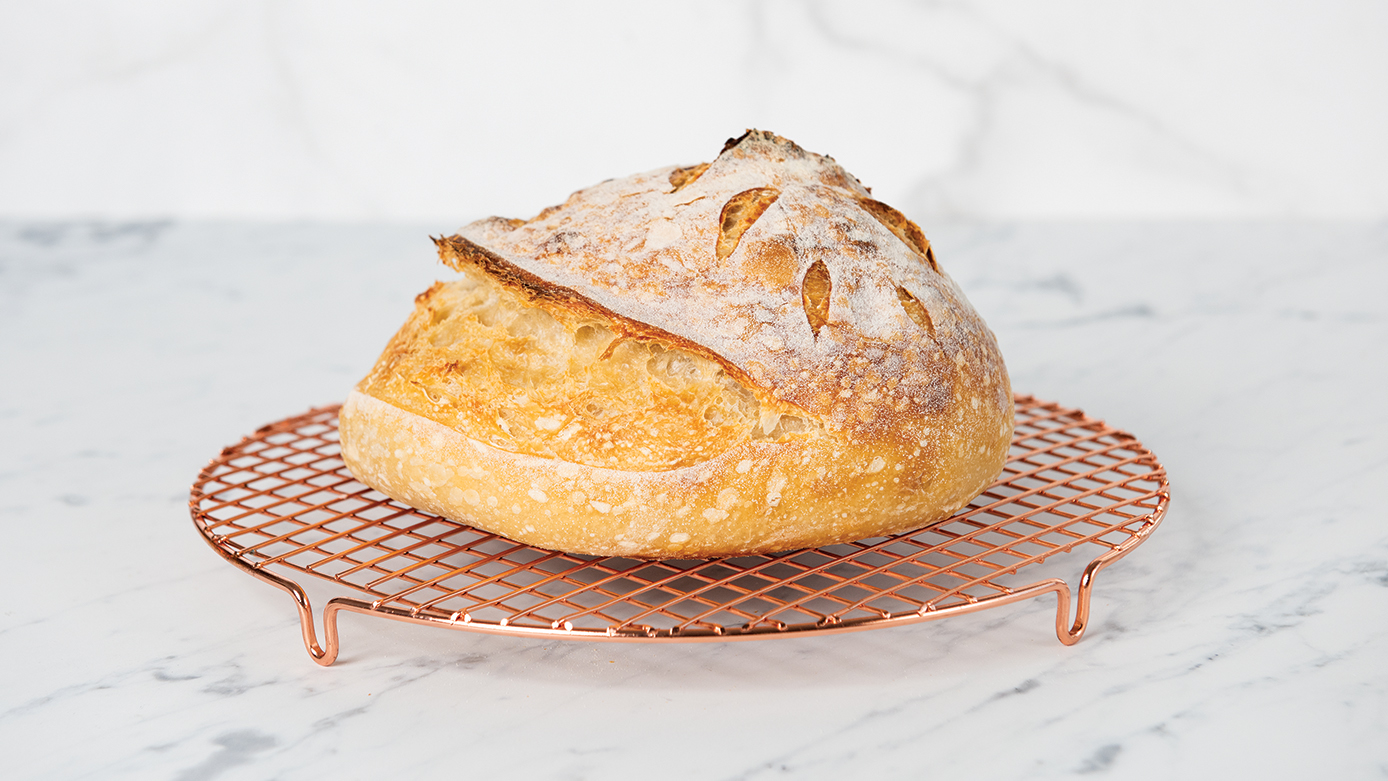
Nicely Fermented Sourdough Loaves
When fermentation is just right, your sourdough loaf will have an airy, chewy interior with a beautiful rise and great flavor. The crumb will be even and tender, and the crust will be crisp and golden brown. A well-proofed loaf doesn’t have to look perfect to taste amazing. What matters most is that it has structure, rise, and a texture you enjoy eating. Because environmental factors like kitchen temperature and humidity can influence fermentation, it’s helpful to take notes and adjust your proofing times seasonally.
Over-Fermented Sourdough Loaves
When dough ferments for too long, the gluten structure weakens and can no longer hold in the carbon dioxide produced by the yeast. This results in a flat or deflated loaf, often with a tight crumb and minimal oven spring. The crust may separate slightly from the crumb and the loaf may spread rather than rise during baking.
If your bread turns out over-proofed, try reducing the fermentation time next time and be sure to monitor your dough closely. A slightly domed shape and gentle bounce when touched are good indicators that it’s time to shape and bake.
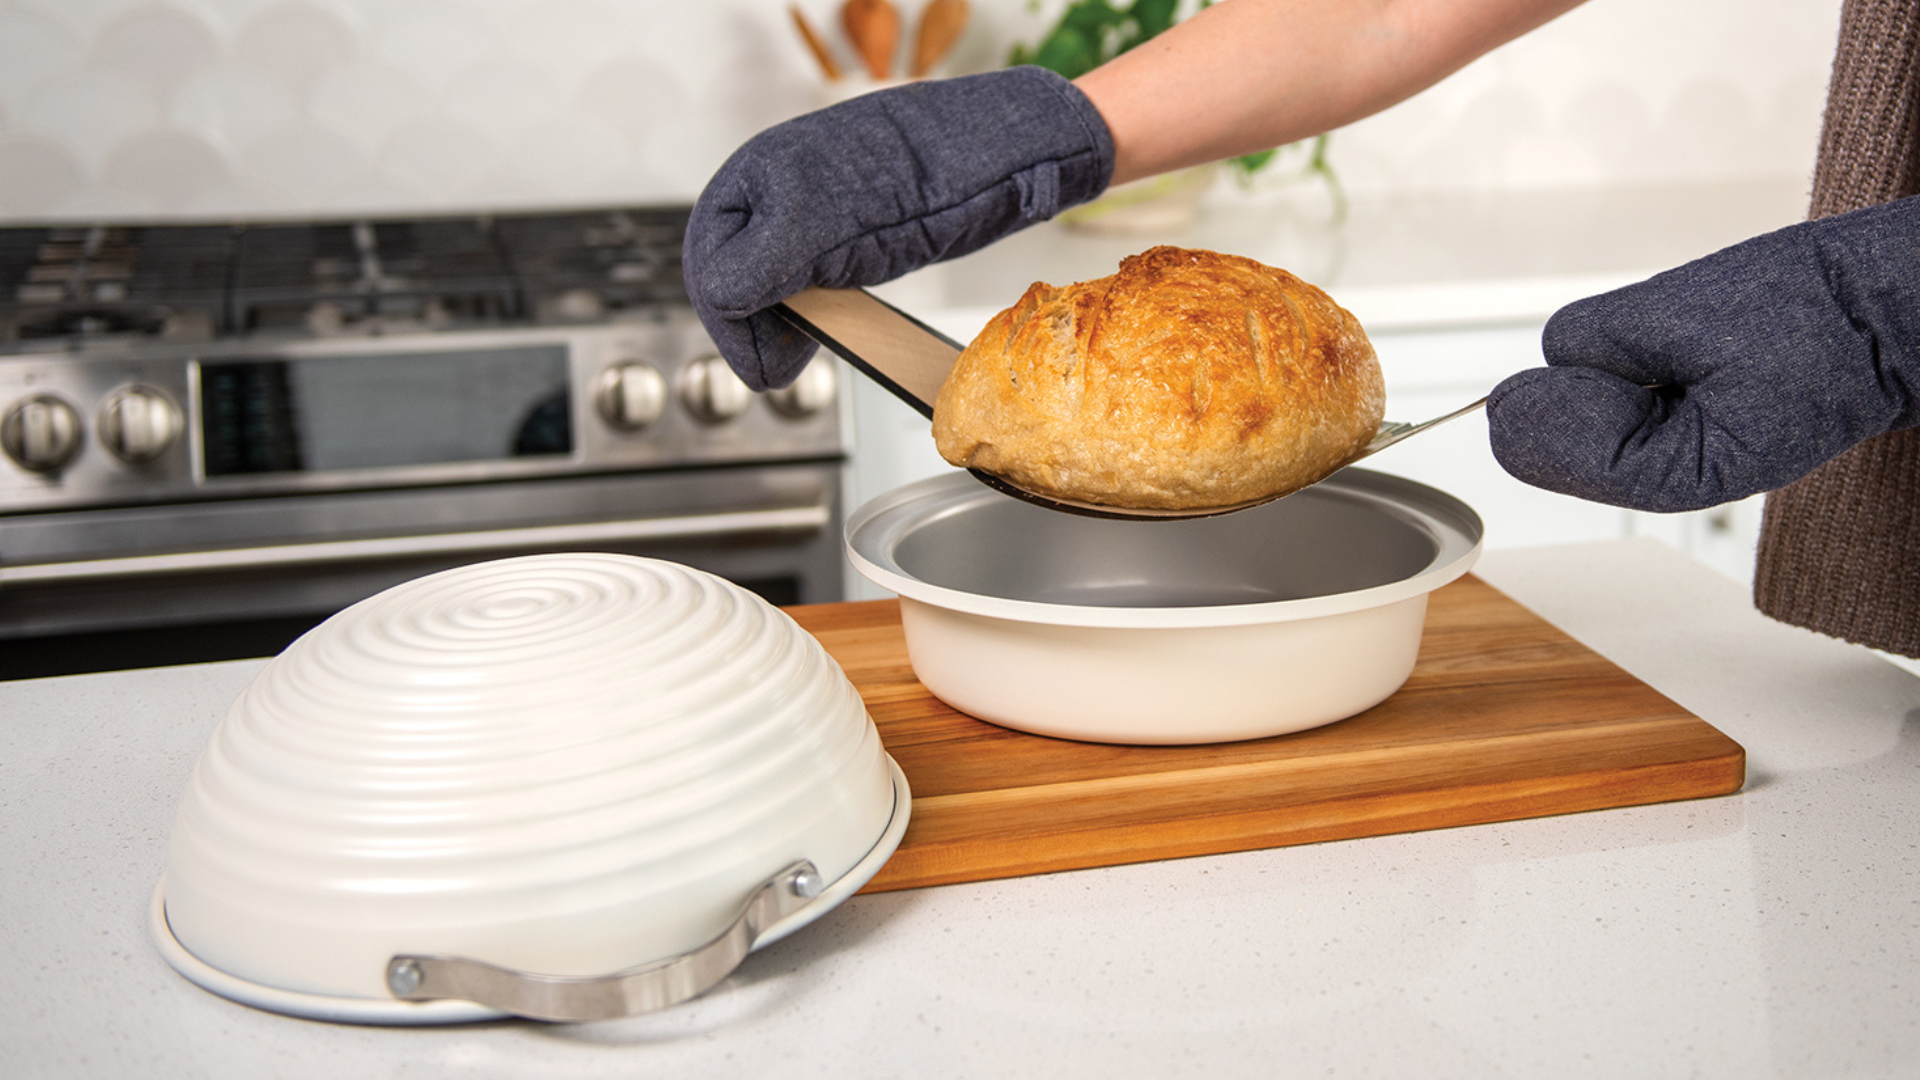
Storing and Reheating Sourdough Bread
Why is it important to store my sourdough bread with care?
Once you’ve baked the perfect sourdough loaf, it’s important to store it properly to maintain freshness. Thanks to the natural acidity created during sourdough fermentation, your loaf will resist mold better than most store-bought bread. However, sourdough can still go stale if exposed to air or moisture.
How do I store my sourdough bread?
For short-term storage, keep your bread on the counter for 3 to 5 days. Place it cut-side down on a cutting board or store it in a breathable bread bag or box—never in plastic, which traps moisture and softens the crust. Avoid refrigeration, as it speeds up staling.
For longer storage, sourdough freezes beautifully. You can freeze the whole loaf or pre-slice it and store the slices in a freezer-safe bag. When you’re ready to eat, slices can be toasted directly from frozen, which makes this method incredibly convenient for everyday use.
How do I reheat frozen sourdough bread?
To reheat an entire frozen sourdough loaf, quickly run the crust under cold water to moisten the exterior, then bake it in a preheated 350°F oven for 20 to 30 minutes. This helps reactivate the crust, making it crispy again, while warming the interior. For individual slices, pop them straight from the freezer into your toaster, air fryer, or oven. If you want to take things up a notch, lightly run each slice under cold water before toasting. This simple trick enhances the texture, delivering a soft interior and perfectly crisp crust.
Every Bread Bake Is a Learning Opportunity
Post-bake analysis is one of the most powerful tools for improving your sourdough baking skills. By examining the crumb structure, reflecting on fermentation timing, and learning to adjust based on your observations, you become more in tune with the unique rhythm of sourdough. Combine this with smart storage techniques, and you’ll enjoy bakery-quality sourdough bread anytime you crave it.
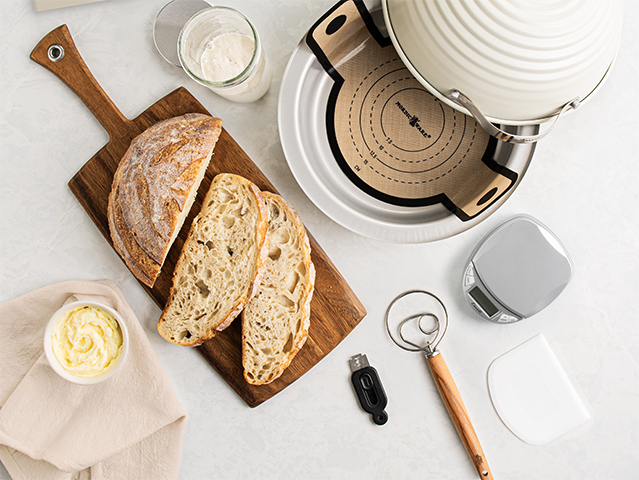
Want to take your sourdough bread baking to the next level? Our Basic Simply Sourdough Bread Kit contain all of the tools you need to create artisan bread at home including a a quick start guide containing sourdough tips and tricks, recipes, and step-by-step instructions to get you started on your bread baking journey today.
Want more precision? Upgrade to the Deluxe Simply Sourdough Kit, which includes an Escali Digital Baking Scale that is perfect for dialing in hydration levels and achieving consistent, bakery-quality results every time.
Learn more about our Simply Sourdough Bread Baking Kits and start your artisan bread baking journey today.

