How to make an Apple Pie
Thanksgiving dinner – an honor and a challenge to host for the gathering of family and friends. Golden, roasted turkey, all of the side dishes and fixings – then the pinnacle, for dessert enthusiasts, the perfect creamy rich pumpkin pie. But what’s this!? My Great Aunt, from afar, who has traveled the world and eaten in every culture, is coming and HATES pumpkin pie. How can anyone dislike the spiced sweet mixture with a perfectly flaky crust where the only decision is – whipped cream or a sharp cheddar cheese slice on it. Yes, my mother’s family always served pumpkin pie with a tangy, salty, smooth slice to compliment the pie’s sweetness, something I grew to love, but not my husband and kids.
Fortunately all is not lost, since I love making pie and apple pie is still a fall favorite especially with local apples available. Now, I can make real pumpkin pie “in my sleep” after growing the cute, weighty squash for 30 years as an organic produce farmer. With apple pie now added to the menu, it’s time to get the red 3 ring binder Betty Crocker Cookbook (circa 1970’s) off the shelf to review a delicious, basic apple pie recipe even the fussiest eater would love.
CRUST:
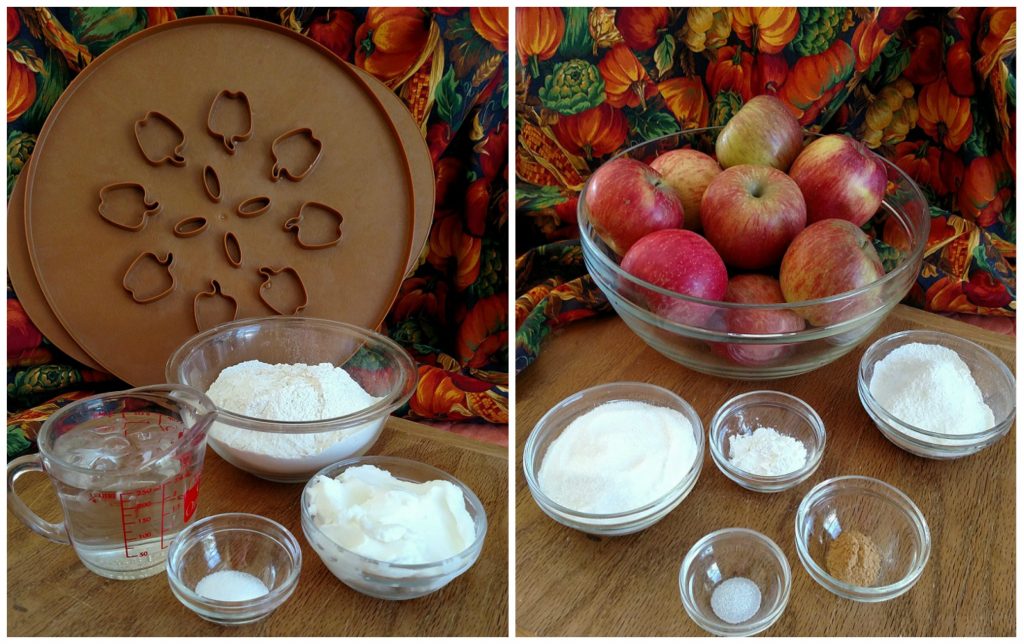
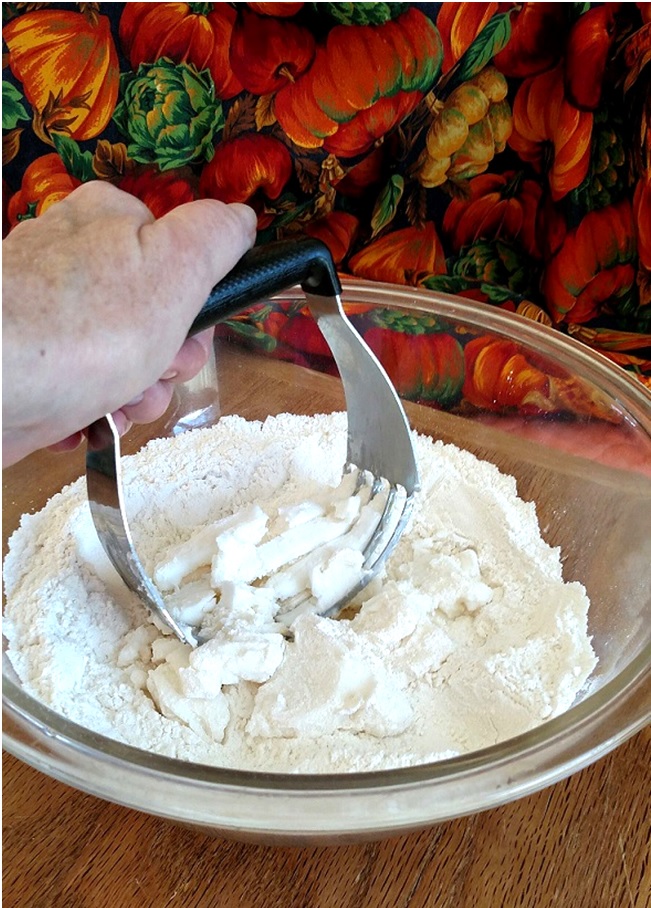
To start, gather the basic crust ingredients and filling ingredients. For the crust, simply combine the salt and flour, then cut in the shortening with a pastry blender. It makes sharp cuts and helps coat the shortening particles with flour. You can make your crust with butter or lard as your fat source for the crust giving you different flavor, texture and measurements.
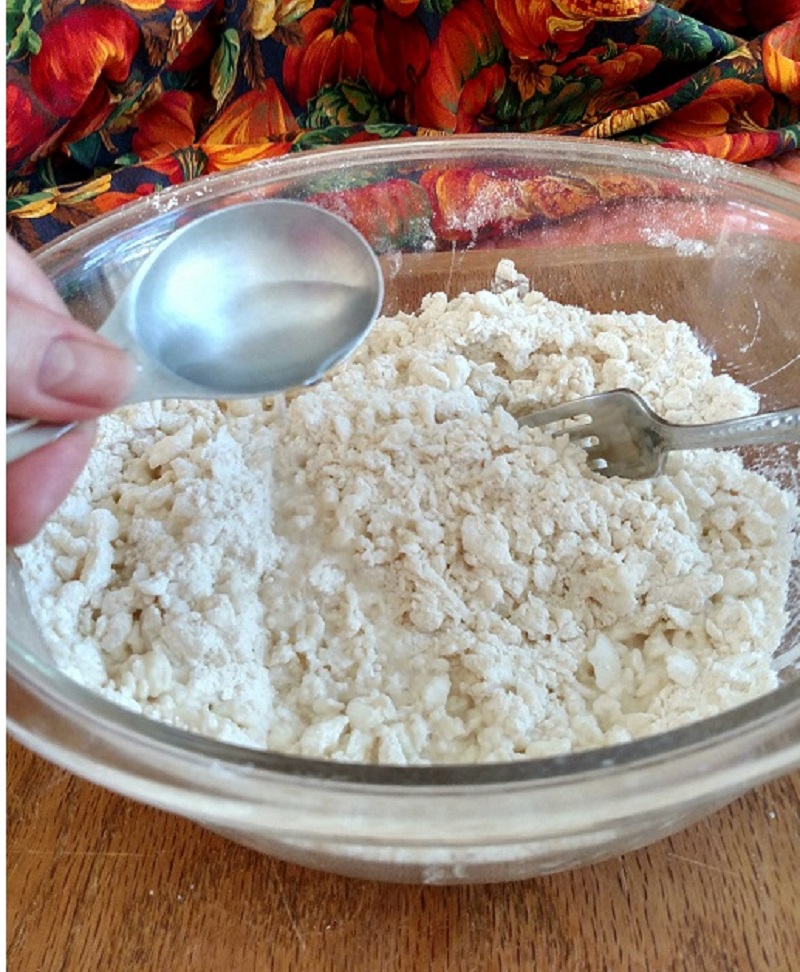
Once your mixture looks like small peas, then sprinkle on the ice cold water, one tablespoon at a time, over the mixture while stirring gently with a fork. The dough will start to come together, so I use my hands to lightly work it into a ball. Too little water will make it too dry and crack when it is rolled; too wet and it will stick to EVERYTHING! It needs to feel like clay or play dough, but I guarantee it will taste MUCH better. I like to knead the dough a few times so the layers of shortening and flour are multiplied. Overworking the dough will make it tough, and “cardboard” is not edible in any pie. Cut the dough in two equal pieces before you cover and refrigerate them. Keeping the dough cold prevents the shortening from blending into the flour so the crust will be flaky.
APPLE SELECTION AND PREPARATION:
It’s time or the easy filling and finding the right apple is important. I love Haralson Apples for their crisp, firm texture, their ability to hold their shape, and their sweet tangy flavor. Once I used an early fall apple variety and I had applesauce surrounded by a soggy crust. Many fall apples work well for pie like Gala, Granny Smith, etc. but I don’t recommend Red Delicious apples as they don’t hold their shape.
After peeling, I like to use an apple cutter since it cores and cuts in one push. Since I prefer lots of fruit, I put the apple sections through my food processor with the slicing blade. It cuts all the apples quickly and evenly and will fill the crust more evenly and bake thoroughly.
FILLING:
Mix the dry filling ingredients, then after you sprinkle it over the apple slices use a fork to gently toss the apples so all of them are coated. If you want white slices, simply sprinkle a tablespoon of lemon juice over the slices as soon as they are cut and toss them to coat.
BUILDING YOUR PIE:
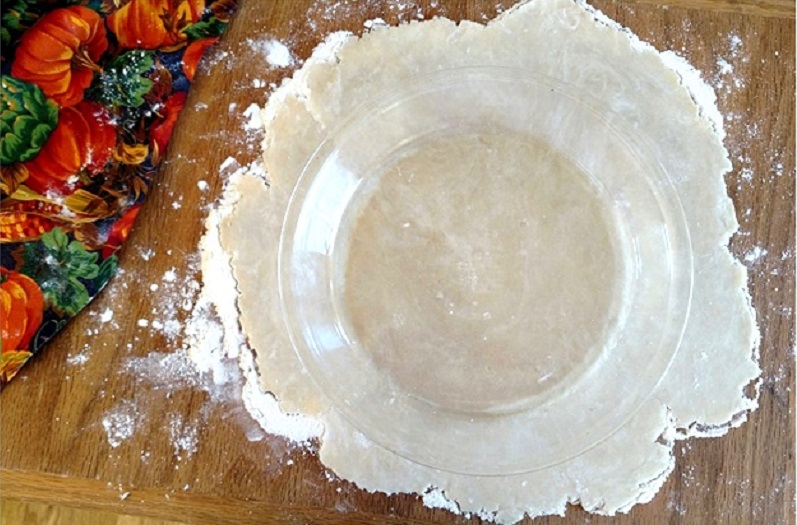
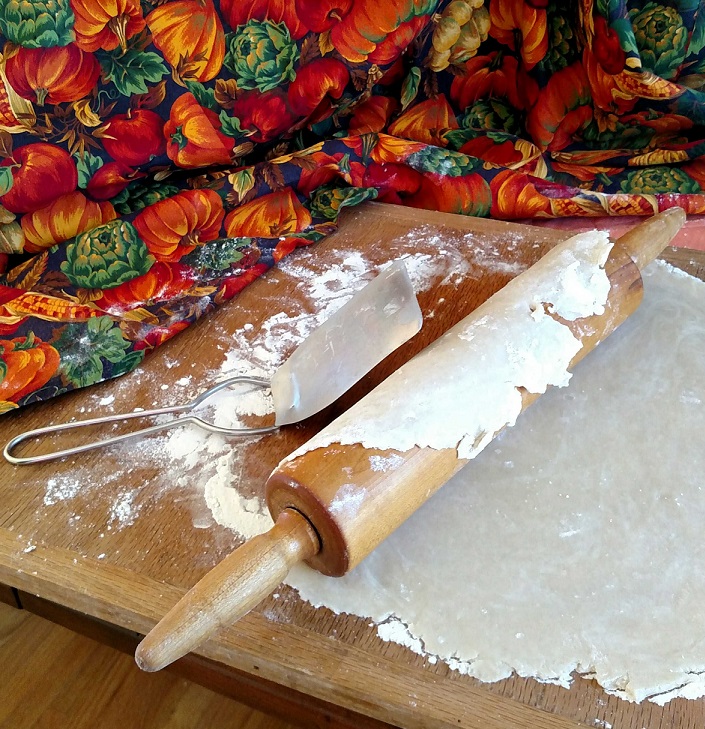
Once I flour my board (or clean countertop) I take one dough chunk, shape it into a ball, then flatten it so I have a place to start rolling. Be sure you work from the middle out to the edge, being gentle and even as you move around the dough. I size the crust by laying my pie plate over the crust to be sure it is an inch larger than the plate edge. It looks lovely, but how to get it onto the pie plate? Easy! Just slowly roll it onto the rolling pin using a thin spatula to guide the dough and scrape the board if the dough starts to stick. Once on the rolling pin, start on one side and unroll, moving across the pie pan. It is important not to stretch the dough, just work it into the corners – if you stretch it, the dough will shrink in the baking process and make the pie uneven. I like to trim the edges so they are even.
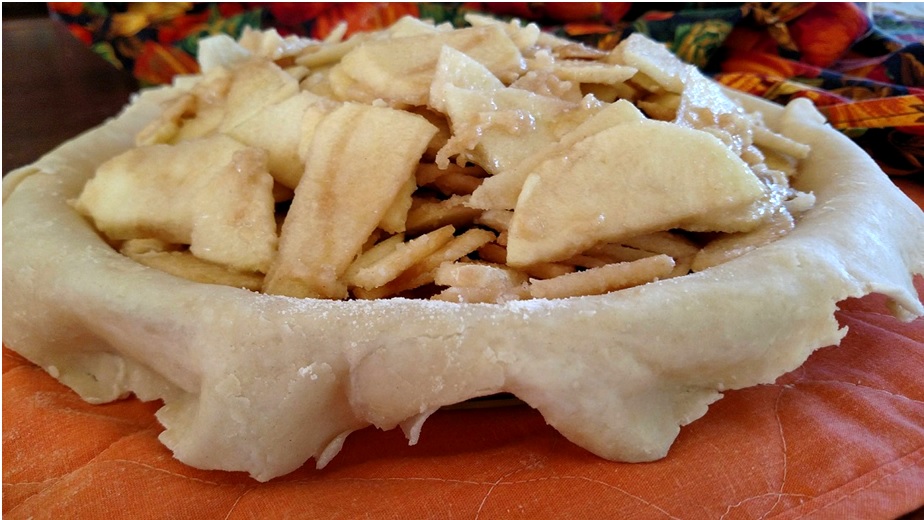
Time for the filling. Carefully scoop the coated apples into the crust, making sure they fit flat and evenly, otherwise the slices can poke through the top crust. Also, the apples will sink while they cook, so fill the pie evenly and full or you will have a skinny baked filling.
PIE TOPPER:
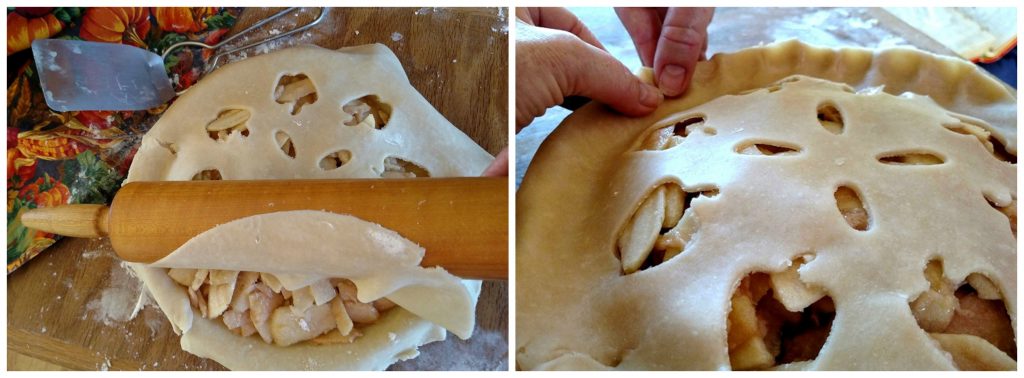
After rolling out the top crust, a quick and easy way to make a beautiful design is to use a Nordic Ware Pie Top Cutter. They have fun designs, traditional and seasonal, and they are a fun way to WOW your guests. I find it is easy to use if your top crust dough is cool, and I spray the cutter surface with cooking spray then sprinkle with flour. Be sure your crust is rolled bigger than the cutter, then press it completely and firmly into the dough.
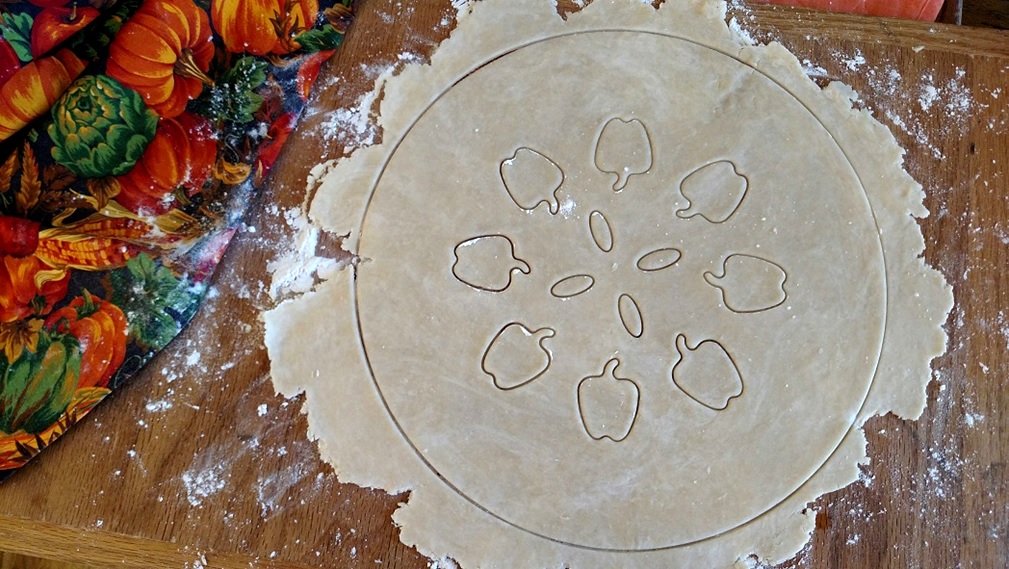
Once you lift it straight off, you will have a beautiful pattern. Roll it onto the rolling pin, like the bottom crust. and unroll onto the apples. I fold the top edge over the bottom all the way around the pie, then crimp it (with fingers or a fork) so that the seal will prevent the juices from bubbling out of the crust and onto the bottom of the oven! There are many ways to finish the top of your crust – egg wash, brush cold water – but I just use a simple sugar sprinkle giving the top a sparkle.
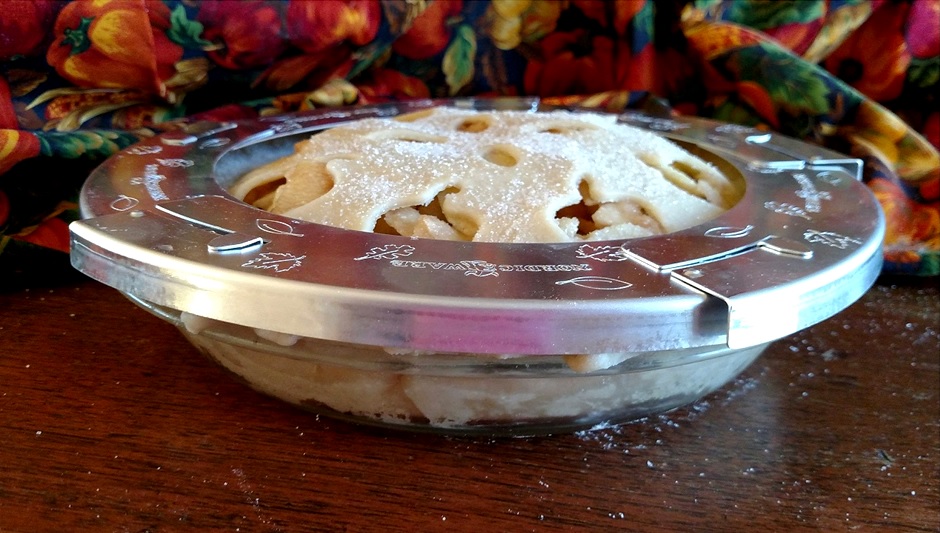
Before I put the pie in the oven, I use the adjustable and reusable Aluminum Pie Crust Shield made by Nordic Ware- what a fabulous idea! The four section slide together and adjusts to fit 9” – 10” pies. No more foil pieces falling off in the oven and making a burnt section on the crust. By placing the shield on the edge, then removing it 15 minutes before the pie is done, the edge crust will be golden brown, crisp, and flaky.
BAKING:
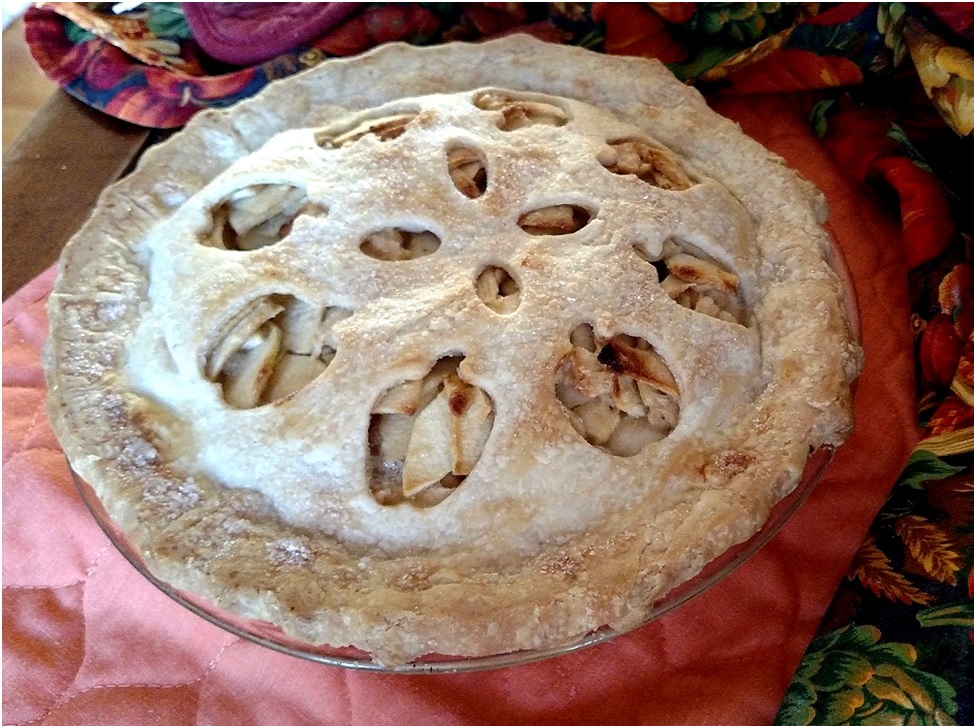
Once the apples start to bubble and the crust turns golden, I use a small metal skewer inserted into the apples to feel the firmness of the slices. I don’t like them too soft or too firm.The pie will serve best when cooled but slightly warm on the bottom of the pan. By letting the apples “set” the filling will not be apples with “cinnamon soup”!
Now if everyone doesn’t need “just a little slice of each” I will have enough pie for the pumpkin fans AND my Great Aunt!
For the FULL RECIPE, visit our Recipes Page HERE!
Joyous Baking and Happy Thanksgiving!